In short: You can convert a microSD-to-SD card adapter (that comes with nearly every SD card) into an SD card interface for your 3.3V microcontroller (e.g. ESP8266, ESP32) without any additional hardware.
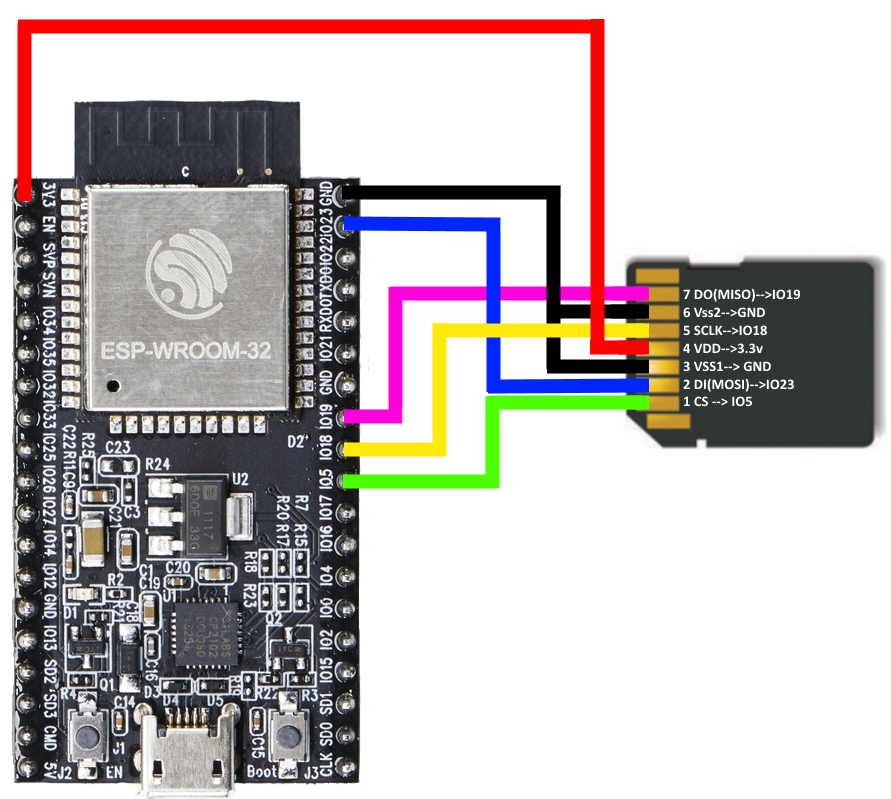
It turns out that SD cards can use the serial peripheral interface (SPI), which should make it easy to connect one to almost any microcontroller—in theory. Rather than buy a dedicated breakout, you can solder your own with only a few wires. The pin connection is documented on the ESP32 Arduino Framework on Github (reproduced below), but if you solder that connection up on an SD card, it becomes a little difficult to use the card with a computer when you want to read or write new data.
 Image source: ESP32 Arduino library on Github. Your pins will probably vary (mine did, even with an ESP32).
The solution is to solder up the microSD-to-SD adapter that comes with almost every microSD card instead. That way, you can remove and write to the microSD card as needed by using a separate (unsoldered) adapter.
There's an obvious confouding factor here: soldering irons are hot, SD cards are made of plastic. I use lead-free solder, which requires a hotter temperature anyway. The technique is then, fairly obviously, get everything lined up perfectly and try to solder as quickly as possible. I am a mediocre solderer and managed to get away with minimal meltage (apparently that is a word!).
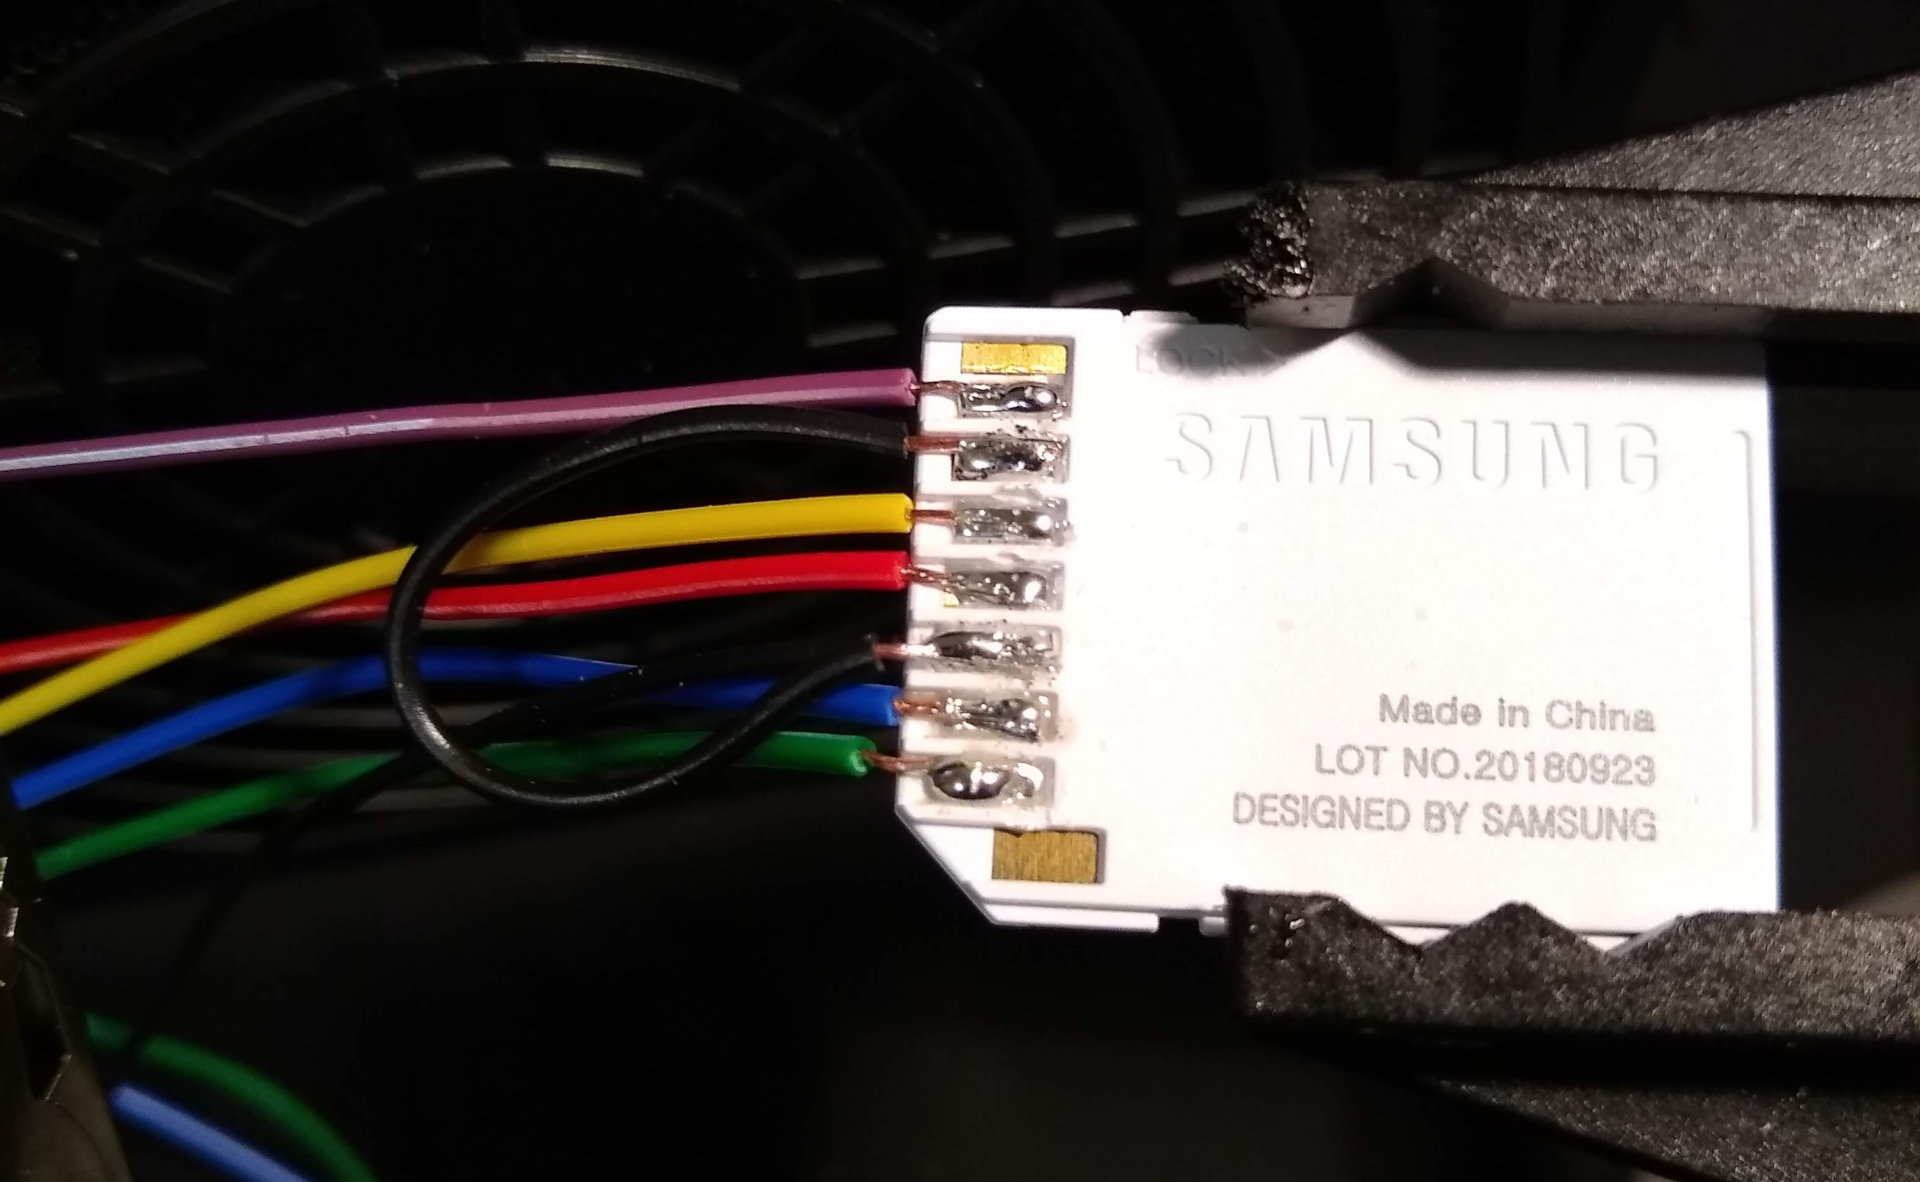
You can see from the image at the top that I didn't do a perfect job, but it works. If you compare the wiring diagram with the image at the top, you'll see that the colours match up. For reference, or if you're using a different board, here is the pinout:
| SD Card pin | Microcontroller pin | Wire colour |
|---|---|---|
| 1 | SPI CS | Green |
| 2 | SPI MOSI | Blue |
| 3 | Ground | Black |
| 4 | VCC (3.3V in) | Red |
| 5 | SPI SCLK | Yellow |
| 6 | Ground (shared with 3) | Black |
| 7 | SPI MISO | Pink |
If you're wondering about the specific pins for your board, run a Google Image Search for your board's pinout, e.g. "ESP8266 pinout", "ESP32 pinout", and select a diagram that looks like your board.
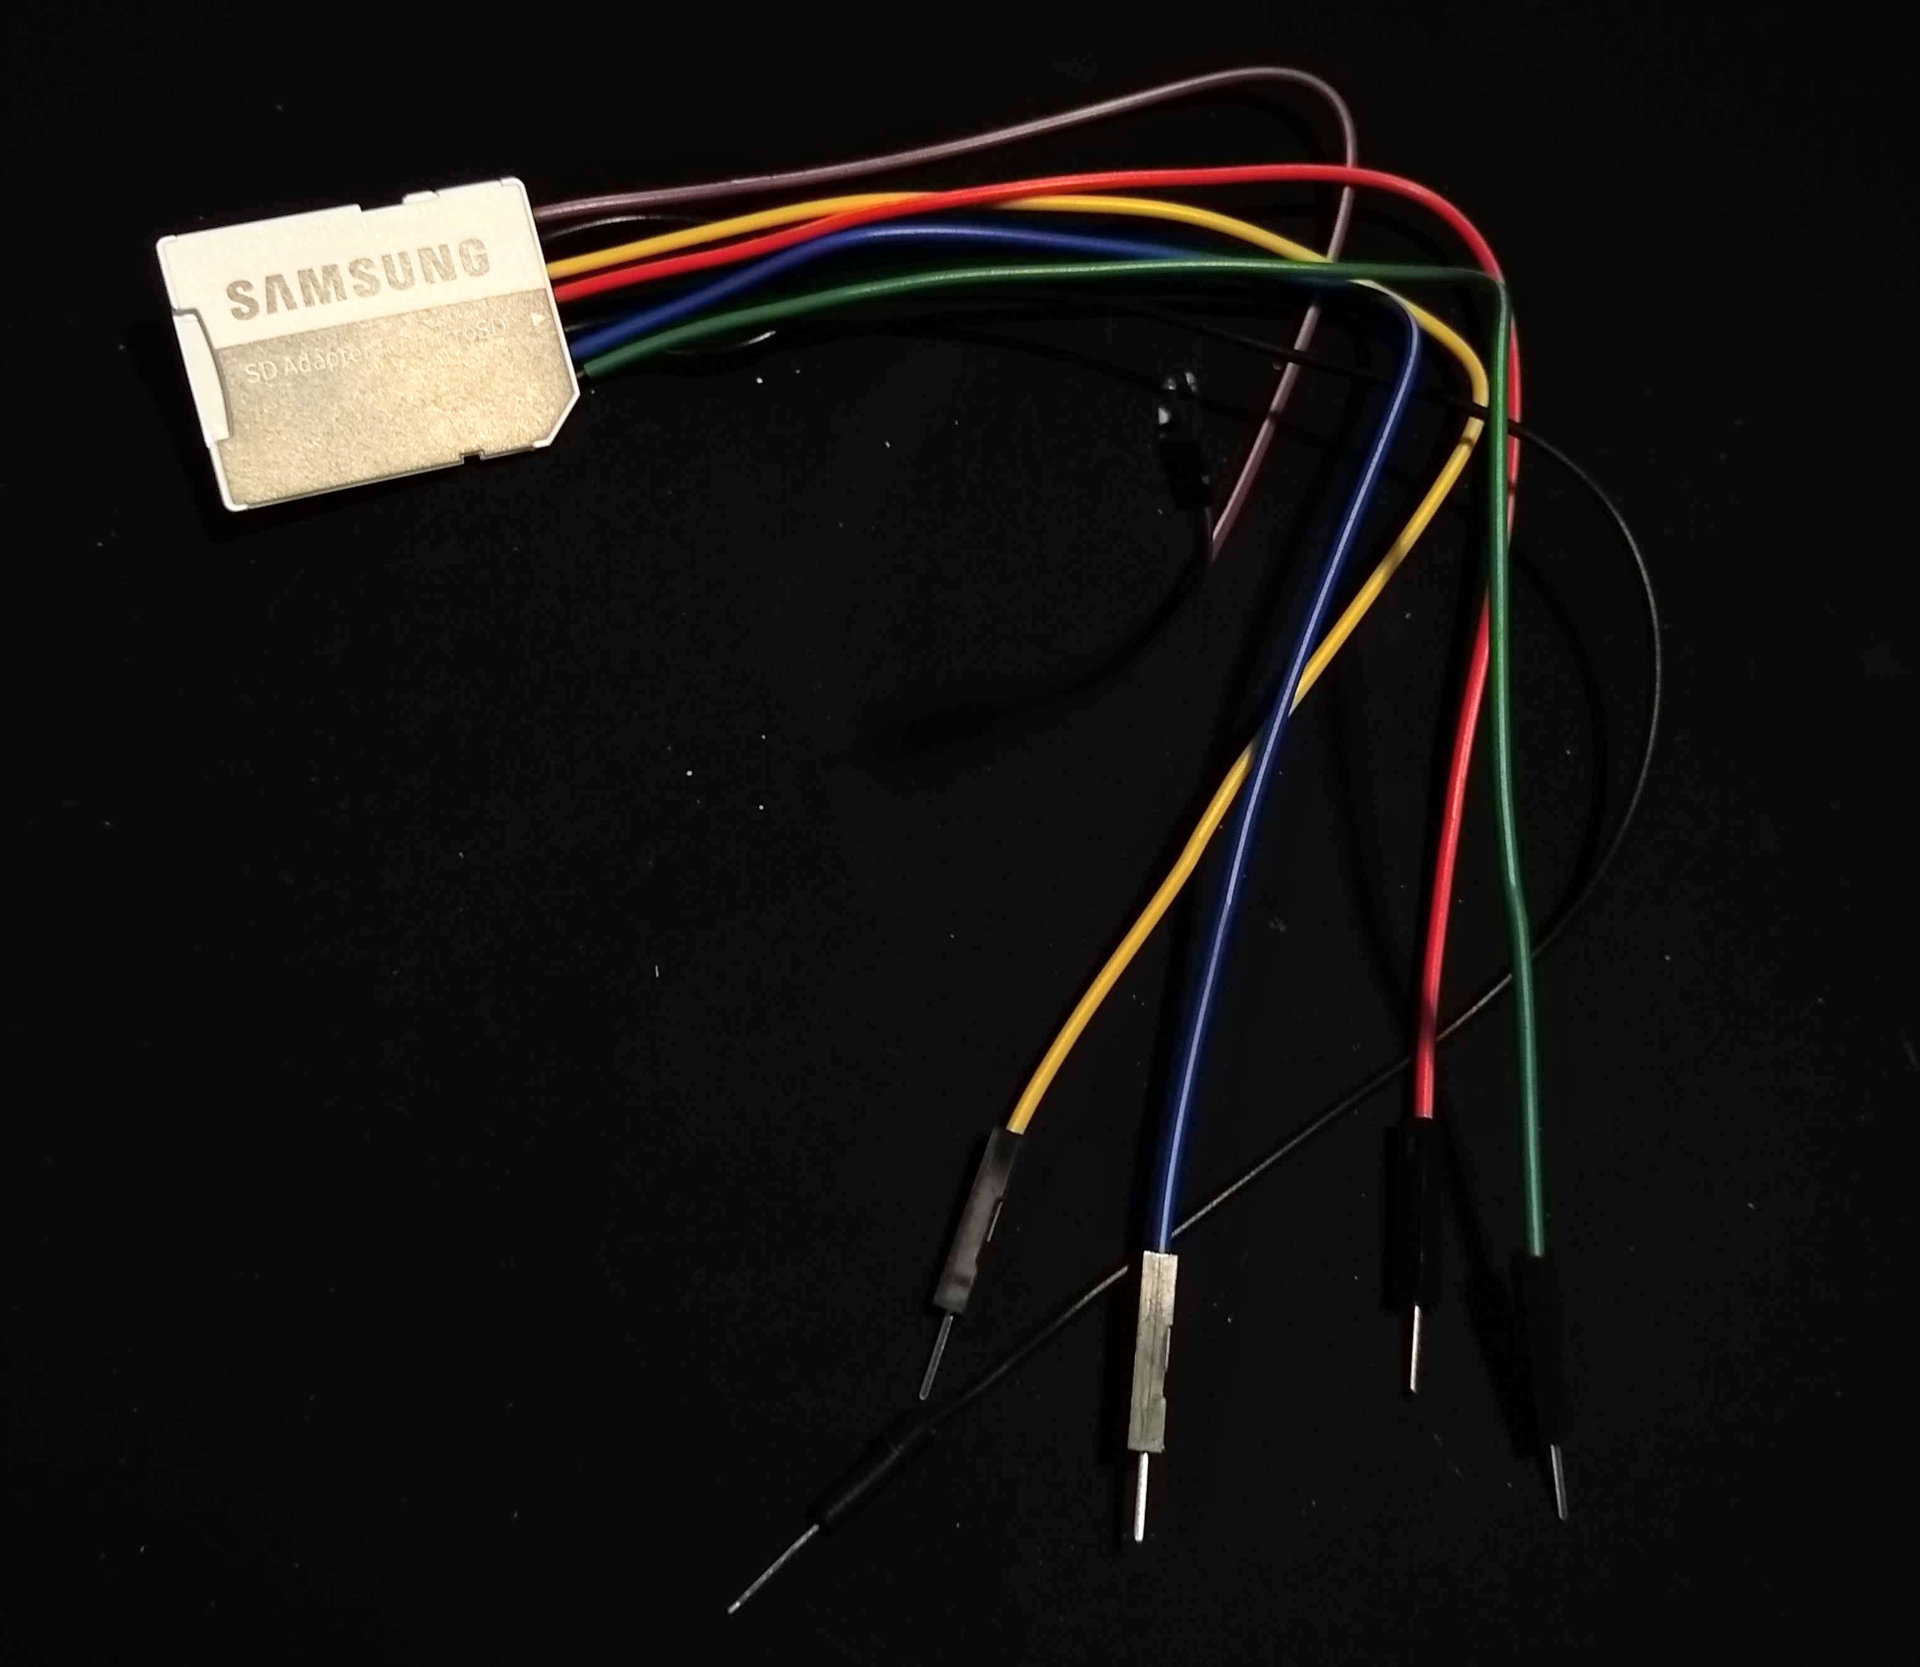
Here's a look at the adapter from the other side:
 Image: MicroSD to SD card adapter wired up for SPI interface.
Note to self: Perhaps a black mat isn't the best background for photos!
Using SD cards with the Arduino (5V micrcontrollers)
The catch is that this will only work without modification on 3.3V microcontrollers like the ESP8266 and ESP32. The Arduino family logic pins are 5V, so you'll need a logic level converter. You can make a logic level conversion circuit if you have the right integrated circuit lying around. That option limits the SD card speed, but that's probably not an issue for most purposes.
Other options
Of course, there are easier options: you can pick up a breakout like the one below from AliExpress for under a dollar (!) by searching "micro sd spi", if you don't mind waiting a few weeks (at least, that's how long delivery to the USA seems to take). You can also build an adapter using header pins, which admittedly looks much less crap than my solution. Needs some gluing though, so it comes down to what you have available.
Code examples
In case anyone comes across this post and is wondering how to access files on the SD card, here are some pointers:
- If you use the Arduino IDE, you can find examples under File -> Examples -> (Examples for any board section) SD. The examples are also available on Github.
- SD card examples for ESP8266
- SD card examples for ESP32
Summary
It's easy enough to connect up an SD card to the ESP8266 or ESP32 by soldering a few wires. Not sure if this post is actually useful given the availability of cheap adapters and better looking solutions, but if you need an adapter without having many parts on hand or time to wait for a delivery, hopefully this post might help.
Thanks for reading!